Done with the Pond

Haven’t updated for two weeks since I was writing the dissertation and, creating new model & animation assets that don’t really deserve a post..

屏幕快照 2016-08-07 17.03.17

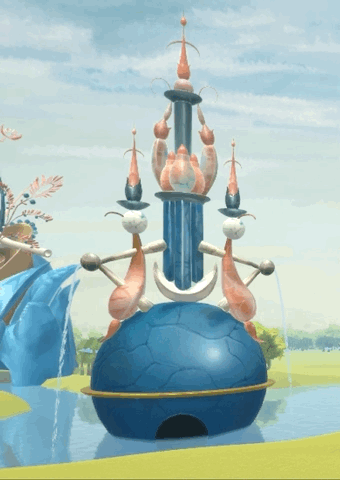
Now everything in the pond part is finished and I grabbed a video like I did for the circuit here. There’s also one controlled by scripts here and this time it’s an interaction:) Some environmental particle system details as well: sun shafts, falling leaves, some shining “dust”, and bubbles – exist in the painting I think they should be bubbles but who knows….

One Problem of the video is the blur on the right of the screen. I always get this in game mode if I have camera effects (even the build file has this too), and, this was tested to be the problem of my mac because others’ don’t have. No idea how to solve it at the moment..

And the third person controller model is changed now! Made some animations for him cos I thought I use different mesh and rigs with the Unity Ethan but, the fact is that it’s just super easy with no use to make any animation. Just import the humanoid model and do the configuration. Brilliant.

Found an easier way for couple animations, that I can export them in one fbx file, drag into the scene and delete one of them, and give the left one a clip with the original avatar. This would break the prefab but doesn’t really matter and it’s a lot easier to control the position etc.

Very proficient with the modelling and texturing now feel a bit sorry for those made at the very first lol.

屏幕快照 2016-08-07 12.52.24

Come the gifs!

dragonfruit

peachbirdeatowlupdown

The interaction is this hugging couple controlled by a boolean. When the player comes into a distance they’ll stop to be as the interrupted  pose in the painting, and when the player goes they’ll continue what they were doing 😛

cp

Less than two weeks left dunno if I could finish everything… Go back to work!!

diao

The Architecture 4: Experiments with Water

The third big building seen in the game mode (with some vignette and bloom camera effects, just the experimental version), and also the newly updated painted skybox, fog and some faraway mountains!

Didn’t really care about the upper and downside parts because they’re out of sight, and now flaws are that although I made distortion close to the sides, they still act quite square-like in the scene. And the seams can be seen. I’ll leave it for now.

buildingball

屏幕快照 2016-06-24 11.47.30

The “real colour” in scene. And there’s a black ball inside to make the shadow effect..

I used two pairs of particle systems to make the two fountain things. One dropping column of water and one for the spray (because it seemed not very natural and also it’s rather complicated to make the collisions so I’d fake it).

The renderer I used is stretched billboard so that the water seems quite coherent but not like stupid squares. Higher emission rate than the default setting and a decreasing curve of the size to make it like in the painting that rather smoothly flowing at first and getting thinly scattered later. I also set the order in layer to 1 or the particles would be weirdly blocked by the river water in scene mode. And for the material, I tried all kinds of shaders including the particles ones and water ones in FX and chose the Water 4 in Unity’s standard assets, and used my sky texture (which is exactly a white to dark gradient) for the internal reflection.

For the bouncing spray I used a capsule mesh instead of a billboard.

buildingballwater


The Architecture 3: Painting Texture & Physics

I found I was being so stupid to paint the textures using just Photoshop based on the exported uv “blindly” before, it was so slow and painstaking and there were quite a lot flaws because of the non-contiguous seams. And I learned from the Night Cafe Project that he used Mudbox to paint the bitmap directly and turns out nice so I am considering to get one too.

But I used Blender’s texture painting this time for the new building. It’s much easier than use only Photoshop although the hardness of the brush is unchangeable and it turns out the vague edges which is quite unpleasant.

I also tried the unlit shader as used in the Night Cafe which creates an amazing painting-styled environment. It’s kind of a 2D-like 3D, but I have to say at this stage the flat colour is not really compatible with others and everything needs to be changed if I wanted them to fit. I’m going to change the skybox, but I have no idea if I can manage the terrain and plant. Also the style of Bosch is more realistic and not like Van Gogh’s, and there’ll still be reflective materials like glass and metal so, I’m not sure now but maybe it’s not suitable for mine. But it’s good to know this technique.

Anyway I’ve just finished the second big building and I tried more with the joint physics which was used on the hanged red ball on the above pink building.

屏幕快照 2016-06-29 13.19.08

This time I tried to make the branches waves so I gave it a try to separate them into pieces and add joint physics. So as how people make rope physics, the tip one is the child of the former one which is again the child of the one before it… But if I still use hinge joint then they’ll collapse like a hinge will do and a branch is not gonna be soft as that. So I tried fixed joint. It turned out nice to wave like a branch but the problem was it would soon stop even though I turned of the drag coefficient. And then my solution is to tie something transparent as hinge or add some constant force to the top ones, as well as add their mass.

For those grow upwards I unchecked the “use gravity”, just use hinge joints and add an upwards constant force to the top one, so it moves like a balloon – maybe they seem a bit too much “enchanting” for a branch though.. Just because fixed joints don’t wave so much and would stop soon even if I added force. There might be some solution to the fixed one though….

buildingCrown

Hopefully it wouldn’t seem “so much” after the other moving elements (creatures) are added later.

The Architectures 2: Start with the Giant Building

Finally finished something again to post a blog! I was making one of the most complex buildings (I hope it will be the most, but…huh), and the texturing, occlusion / all kinds of maps of the complexity drove me even crazier than modelling, placing and the combination, which seems just alright from this not really perspective view of speciosity, while it did become like impossible when it came into 3D… and also don’t ever forget the terrain and humans to see if they will be able to fit in.

Anyway this completely pink squid building has now appeared in my scene. Seems I’m getting more familiar with drawing textures baking lightmaps setting materials things but, this is only one of the five equivalent complexities… so good luck and hurry up I can’t afford to spend as long as this for them…

There is one thing special I’ve done to this building. I just took the attempt to search for the rope physics and there are plenty of tutorials so this became something a bit more interesting in this scene so far… I hope the tree can wave too but I don’t want to bother with the tree system now and there is nothing in my assets looks similar to this.

rope

Some other small things before I started with this pink building:


For things with decorative elements of multiple materials, I duplicate the model, make it just a little bigger and give it another fade / transparent shader or rendering mode, with a height map. Like the bump circles in the left pic and some metallic rust in the right. There is a subtle difference in reflections when you move around which looks quite nice.

berries

And these are just simple rigid bodies so that the berries are rolling around, and when you walk there to kick them away.

The Environment

Haven’t posted anything for quite a long time because I have been dealing with the scene’s setting and the progress is rather subtle compared with the former models and animations that can be counted.

I created a height map to set the terrain of the whole world. It is an easier way than using Unity terrain brush when you have already got a blueprint of what the world is going to be like, especially for dealing with the scale/position things corresponding to the original painting, while I feel the brush tools are quite hard to control because it is not very smooth, either a big gentle slope or a sharp angle, or a perfect shape for the pool, and it takes great calculation all the time.

屏幕快照 2016-06-19 10.22.32

One tricky thing about height map is that if you paint it as you can see it, it would turn out to be a dramatically variant terrain. So everytime I just adjusted it to blindly black after I felt it had been done. (Suddenly found maybe I should have changed the terrain height parameter in Unity instead of turning the map like this?!)

Then I used the brush tools to adjust the details in Unity, to ensure that the ground can fit the things put on it, like nothing of the models is underneath and also they are not floating or seemingly unsteady – some models, like the orange stele and the stones behind it on the right front of the painting, are even constructed with the terrain. I would also be careful about the height around the central pool – those humans are going to ride around the pool, so while they are animated themselves without the position/transform’s change, and will have the script to make them move and rotate facing the way they go, it would be very hard to detect the ground’s shape so I should just flatten the path as the identical height for them.

The next is the plants on the terrain. I would like they are low poly flat shaded (I mean the leaves, but not as low poly as that a tree is composed by several balls and a truck) or I cannot reach the level to be very much realistic. But it is not that easy to find free suitable resources. Trees and bushes have much more complicated structure and things like how they would wave with the wind, than the grass which I can just paint by myself, and at this stage I am not going to learn how the tree system works and make my own trees.

(Carefully chose colours, sizes and species to make them fit together and fit with the whole scene. I feel it quite similar to flower arrangement and it is a pleasant work.) I also used some tiny terrain pieces, put them on the models, adjust them as the slope of models and put grass on them, because grass on the terrain can be animated with wind. Should be careful the grass does not penetrate the models.

I put some effort on the lighting and camera effect. Everything seems very plain and the environment is not attractive at all. But so far the effect has not been satisfied since the environment effect should be of course one of the last things to do, with the skybox and mountains canvas pieces.

Now I have just done things in the front part and I am mainly doing the architectural things and putting them into the scene. So I will add the plants around everytime when I put a model in case I would have to remove them and re-paint.